Automated vs. Manual Accessibility Testing: A Practical Guide

Some individuals count on screen readers to listen to what's on the page, others only use the keyboard to navigate, and many others rely on things like captions or high-contrast colors. Accessibility testing is how we verify that it is possible.
Accessibility testing is not just about following rules; it's about creating digital spaces that everyone can participate in. The benefits are not just about compliance: features that help someone with a disability often help everyone have a more seamless experience.
Accessibility is one of those things that, when built in at the beginning, saves a lot of time, money, and frustration later. Accessibility testing is fundamentally about people more than it is about technology.
With that in mind, let's explore how accessibility testing works and how the two can work together!
Why Accessibility Testing Matters
There are three key reasons accessibility testing is essential:
Legal Duties
- Numerous countries specify accessibility standards for digital products.
- The Americans with Disability Act, Section 508, and WCAG guidelines are examples in the US.
- Not meeting legal obligations and standards can lead to many problems, not the least of which is potential legal action and bad press.
Usability Improvements for Everyone
- Accessibility improvements often aid usability for everyone.
- Good color contrast is helpful in bright light, and captions on videos aid people in loud environments.
Sustainability
- Implementing accessibility at the outset reduces costs long-term.
- After all, it often costs more to fix accessibility issues.
- This also causes more disruption.
However, designing and developing with user mental models and feedback improves quality consistently.
Preparing for an Accessibility Audit
A proper audit begins with planning, not simply running tools.
- Set your goals and scope: Determine whether you focus on compliance, usability, or both. Determine whether there are priority areas to focus on, such as forms, checkout flows, dashboards, etc.
- Use sampling: Automated tools can periodically scan the entire site; however, manual tools would be better used on a limited number of important pages.
- Choose appropriate tools: automated scanner Axe and Accessibility Insights, manual screen readers NVDA and VoiceOver, and combined platforms Pope Tech and BrowserStack.
By setting clear goals, keeping sampling reasonable, and choosing the right tools, you can turn an audit from an arduous task into a productive and positive experience.
Automated Accessibility Testing
Automated accessibility testing involves using software tools to crawl a website or application and report on the accessibility-related issues that may create barriers for users with disabilities.
These tools examine the code for commonly established standards like WCAG and assess it for consistent patterns, such as missing alt text, poor color contrast, broken heading structure, or missing links.
While automated testing cannot replace human judgment, it allows for rapid detection of the types of issues that a machine can consistently identify.
Step-by-Step Process of Automated Accessibility Testing
1. Choose a tool and set it up: Select a trusted tool, such as Axe, Accessibility Insights, or an A11y scanner. Most will be available as browser extensions or can be adopted into a development environment.
2. Set it up as part of your workflow: For automated testing to be successful over the long haul, you need to connect it to your CI/CD pipeline. Every time new code is pushed, the accessibility tests can be run as part of the process.
3. Run scans across your site: You should scan your site once a month or on a regular basis for live websites or every build during development. Automated scanning is best done at scale to scan a complete site.
4. Review the reports: Most tools generate reports that display the errors, warnings, and suggested remediations. From this point, developers must decide which to act on first.
5. Fix identified issues: As long as automated tools indicate an actual code-level issue, developers can make fixes right away.
6. Re-scan: After fixes are implemented, re-scan with the automated tools to verify the issue has been fixed.
| Advantages | Disadvantages |
| Speed & scale: Can scan thousands of pages | No context: Detects alt text but not if it’s meaningful. |
| Consistency: Applies the same rules every time, reducing missed issues. | No judgment calls: Can’t assess confusing instructions or focus order. |
| Integration: Easy to add to CI/CD pipelines to catch the problems with changes. | False positives: May flag items that aren’t real barriers. |
| Less work: Less manual inspection needed. | Limited: Tools catch only 13–40% of barriers. |
Automated testing is a great first defense. It speeds things up, finds common problems quickly, and ensures that accessibility is one of the first things that is thought about, not left as an afterthought. However, automated testing is not enough by itself; this is where manual testing comes in.
Manual Accessibility Testing
Manual accessibility testing involves real users testing a website or app, using the interface in the exact manner that a user with disabilities would.
Manual testing differs from more straightforward automated testing tools/approaches because it requires real interaction with the product using assistive technology and alternative navigation options (screen reader, keyboard, voice control, etc).
This approach is extremely useful in uncovering unique issues that cannot be identified using automated tools. For example, does the link text make sense out of context? Are the forms providing useful error messages? Can an obscure widget be used without a mouse?
Step-by-Step Process of Manual Accessibility Testing
1. Choose a good sample of pages or flows: There's no need to test everything, but choose a small but meaningful sample, e.g., the site homepage, a form page, and an interactive page with a pop-up or dynamic content.
2. Test with just a keyboard: Ignore your mouse and navigate through the site with just a keyboard. Try to reach every button, link, form field, etc. Ensure that focus moves in the right logical order, and that focus indicators are easy to see.
3. Test with a screen reader: Use a screen reader tool such as NVDA (Windows), VoiceOver (Mac/iOS), or Orca (Linux). Listen to how the content is announced. Are the headings logical? Are labels clear? Are error messages conveyed properly?
4. Review visual elements: Consider text size, color contrast, and focus states to determine if they are easily readable and noticeable.
5. Review interactive content (dynamic content): Forms, pop-ups, drop-downs and customized widgets often provide resistance. Make sure these interactive elements function seamlessly with assistive technology.
6. Document issues: Consistently report findings, identify issues by seriousness, and offer suggested corrections so developers can make changes.
| Advantages | Disadvantages |
| User perspective: Reflects real experiences of people with disabilities | Time-consuming: Slower than automated testing. |
| Contextual understanding: Checks if instructions, navigation, and labels make sense. | Requires expertise: Needs trained testers with accessibility knowledge. |
| Covers complex areas: Finds issues in forms, widgets, and dynamic features. | Not scalable: Impractical for large sites. |
| Actionable feedback: Provides insights for long-term accessibility improvements. | Variable results: Depend on the tester's skills and experience. |
Manual testing adds value because it includes the perspectives of users that you can't replicate with automated testing. It demonstrates whether a site is not only technically compliant but truly usable for people with differing needs.
Automated vs. Manual Accessibility Testing: Side-by-Side Comparison
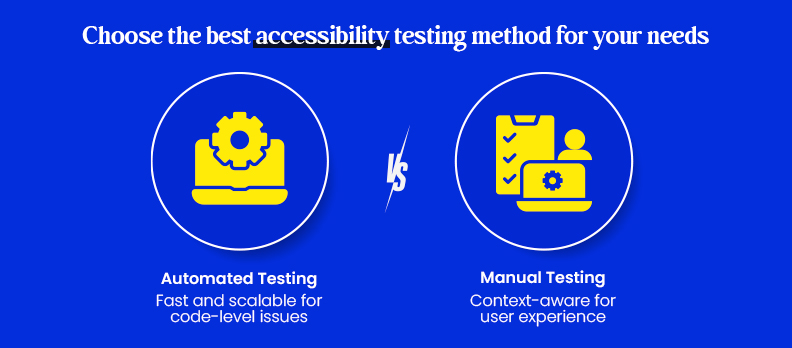
Sometimes it’s easiest to see differences in a side by side comparison. Here's a light comparison of automated versus manual accessibility testing:
| Aspect | Automated Testing | Manual Testing |
| What it checks | Code-level issues such as, missing alt text, color contrast, empty links, heading order, etc. | User experience issues such as, unclear link text, confusing error messages, bad focus order, inaccessible custom widgets, etc. |
| Speed | Fast, automated testing can scan thousands of pages in minutes. | Slow, tests require a person to navigate and test flows. |
| Scalability | Highly scalable, works well across very large sites. | Limited scalability, best for representative samples or key workflows. |
| Accuracy | Consistent but limited, may catch false positives, and misses context. | Context aware, catches subjective issues, but varies by tester experience. |
| Skills needed | Minimal training to run scans, and most developers can do it easily. | Requires experience with accessibility standards, assistive technologies, etc. |
| Best for | Early identification, continuous live monitoring, fast feedback loops. | Deep insights for usability, validation in real-world, complex interactions. |
Common Accessibility Issues Typically Found by Each Method
Automated testing and manual testing differ to process and also reveal most different types of problems. Understanding what each can find can help you set expectations.
What Automated Tools Usually Catch
Automated scans can detect fairly clearly defined code-level problems that can be checked against rules. For example:
- Missing alt text: Images that have no alternative text that describes the image.
- Empty links/buttons: Links or buttons that do not have an accessible label.
- Headings that are not nested properly: Headings are out of order create a challenge for the users using screen readers to navigate.
- Color contrast failures: Text that doesn't pass contrast expectations, which makes the text hard to read.
These are "quick wins" because they can be easily defined by rules and can typically be corrected without much effort.
What Manual Checks Usually Catch
Manual testing finds issues that look at how users experience interacting with a site. For example:
- Confusing or repeated link text: For example, multiple link options for content such as "Click here".
- Unclear error messages: Alerts regarding problems with a form which do not provide any description of the problem or potential changes.
- Poor keyboard focus: The keyboard focus does not flow correctly (eg jumps around), which makes completing tasks difficult when a user does not use a mouse.
- Unusable custom components: Things like dropdowns, sliders, and modals may appear alright but are broken for assistive technology users.
These issues are important because they impact usability even if the site passes automated tests.
Involving Real Users with Disabilities for Accessibility Testing
Automated scans and expert reviews are helpful, but they don't replace the feedback from users of assistive technologies day in and day out.
Why It Matters
Real users have perspectives that tools and experts will not have. A WCAG-compliant form may have compliant code, but is still an unpleasant experience for a user with a screen reader or a switch.
How to Involve Users
- Recruit users with different disabilities (visual, motor, cognitive, auditory).
- Give them real tasks like “complete checkout” or “submit a form.”
- Observe how they go about their tasks, note their pain points, and ask them about their experience.
- Use their feedback to validate issues or uncover problems.
Benefits
- Can confirm whether “accessible” is actually usable.
- Provides authenticity to the results from testing.
- Creates empathy and provides a shift from compliance to inclusion.
Cost and Resource Considerations
Accessibility testing isn't just about process but also about weighing the time available to you, your skills, and your budget. Both automated testing and manual testing require different resources.
Automated Testing
- Lowest budget: Most of the tools are free or low-cost
- Low training: Developers usually can learn to run a scan quickly.
- Quick turnaround: Results are available in minutes, and you can test whenever possible.
- The best fit is for small teams or projects that need regular lightweight checking.
Manual Testing
- Greater demand: man-hours will take a lot of time and usually need trained accessibility specialists.
- More depth: provides contextual feedback within usability and handles complex interactions.
- Less scalable: You cannot realistically test every page on large projects.
- The best fit is larger teams, high-stakes projects, or organizations with compliance restrictions.
Hybrid Approach: Combining Both Accessibility Testing Methods
Automated and manual testing aren't rivals but complement each other nicely for an integrated approach.
Automation provides speed and coverage, while manual testing provides depth and real-world context. A balance of the two will ensure your site is compliant and usable.
Reasons to Combine
- Automated tools will quickly find common issues on a code level.
- Manual testing will find problems with user experience and validate usability.
- The two together give you a more complete and accurate view of accessibility.
Recommended Strategy
- Automated scans should be performed regularly, monthly on live sites, or run on each build while building it.
- Manual reviews should be less frequent, but more specific; for example, annual or utilize a new template.
- When conducting a manual review, focus on impacted pages and workflows, including homepages, forms, checkout processes, etc.
- Consider combined tools; sites like Pope Tech allow you to pull an automated evaluation and then mix it with a manual review for a single score on accessibility.
Example Workflow
- Run your automated scans across the whole site every month.
- Conduct a manual audit of select key pages or user flows each year.
- After every time you build or revise a component/template, you run a more targeted manual check.
- Log your issues over time, and once problems are fixed, re-test.
Accesstive: A Practical Tool for Quick Accessibility Audit
Automated and manual testing cover most of the standard accessibility audit, but sometimes, it is nice to have an easy, quick check to identify obvious issues.
What It Helps With
- Quick site scans
By entering a website URL, tools like Access Audit can quickly surface common accessibility barriers such as missing alt text, low color contrast, or improper heading structure. - Preliminary insights for teams
These initial findings help developers and content creators understand where to start before moving on to deeper manual testing or structured remediation.
User-facing support through Access Widget and guidance via Access Accy also improve immediate usability and awareness. - Compliance awareness
Early insights provide a clearer view of potential gaps related to WCAG or ADA requirements. Ongoing tracking with Access Monitor helps ensure progress is maintained over time, while Access Services can support formal audits, validation, and remediation planning when deeper expertise is required.
How It Fits into Your Testing Workflow
Consider this a first step: run a quick audit to catch obvious issues, conduct automated testing for broader coverage, and complete manual testing for real usability. Adopting this layered approach allows you to create structure and effectiveness throughout your accessibility process.
Conclusion
Accessibility testing is not a linear process. Automated testing gives you speed and scale, manual testing adds human insight, and real people prove that your site is usable for everyone.
Using all these methods, you can identify a broader range of problems, improve user experience, and stay compliant with accessibility standards. Start small, build a consistent process, and iterate over time.
To get a quick sense of your site’s accessibility, you can try a free accessibility audit. It's an easy way to get started and will provide direction for your next steps so that you can better prioritize your improvements.
FAQs
Accessibility testing ensures that websites and apps can be used by people with disabilities, including those using screen readers, keyboards, or high-contrast modes.
It improves usability for everyone, ensures legal compliance (WCAG, ADA, Section 508), and reduces costs by catching issues early.
Automated testing quickly identifies code-level issues like missing alt text or poor color contrast. Manual testing evaluates real user experience, including navigation, forms, and interactive elements.
Automated scans can run monthly or on every build. Manual testing is recommended periodically, focusing on key pages, workflows, or major updates.
Yes. Features like captions, proper focus order, and readable color contrast help all users, not just those with disabilities.
Recruit users with various disabilities and ask them to perform real tasks (like submitting a form). Observe their interactions and gather feedback to validate usability.


